So, I know I have been a terrible blogger and not writing. I did warn you in the first post though.
The reason I haven't written is because my sewing project has been put on hold. The next step requires a second person to help, though I have been told by my hubby that he would help out....I haven't been able to get it done. So, I am not giving up o the project, it has just been put on hold for the moment.
I thought of continuing the sew along and starting the bottoms, but as I was cleaning the other day I caught a glimpse at some plaid fabric (that came from an estate sale my mother went to) and thought it would be a real nice skirt. I think that a skirt would be of more use at the moment (though I don't have any shirts to go with it). I think it would make a lovely 3/4 circle skirt, but I don't think there is enough fabric. I will have to start calculating and see how much it will take (I know there is not enough for a full circle skirt). If there is not enough I will settle for a pencil skirt, if only there was enough for a cute matching short jacket.
I did have a spark happen yesterday when i was thinking about all of those lovely ladies who cook/clean in vintage/vintage inspired clothes and it makes them feel good. I always dress horribly when I cook/clean because I make a mess (even with an apron) and can't bare to ruin any of my nice clothes. The spark came in when I thought about muslin. I could wear muslins (whether made of muslin - could dye or paint to make cuter- or other cheap material) around the house cooking and cleaning and if I ruin them it wouldn't be that big of a deal since they were just used to fit my real garment. That makes me happy. Now if I can just figure out something for vintage inspired workout gear :)
Anyway, Hopefully this weekend while my husband is in the woods, I will be able to get some sewing done and have something to share with you. That's all I've got.
Friday, October 28, 2011
Friday, October 21, 2011
update, well sort of
Okay, so I know I didn't get back with an update yet. That is because there isn't much to update (or that I want to update LOL).
I didn't get to sew the first day because I took my son out to get a much needed haircut. I took pictures and wanted to get him a cute 1940s military style (lovely referred to as "just a haircut" by all the barbers I have talked to). You know the one that Brad Pitt wore....
It is actually quite grown out in that picture and I couldn't find a picture (without his hat) from earlier in the movie so I showed the hairdresser this photo(yes I know it was my mistake not taking him to a barber, but I was impatient and no barbers were open then).
The result was disastrous. So then another evening sewing was missed out on because I had to take him to the barber to get the cut repaired (aka, cut so short as to mask all of the horrible problems). It is cute now, not what I originally wanted, but no weird wavy lines on the head and it actually has some tapering instead of being shaved then long hair.
So I did get something accomplished, it just wasn't sewing.
I tried to work on sewing the one other night I had and I am so far behind that I had to keep going back posts to find the one I was on. The problem is that I didn't go back quite far enough. I ended up doing something out of order and have really screwed up. I am so glad that this flannel is my muslin and I will be making another as the real one. No pictures to show (yeah, it is that bad LOL).
I did find a really good article (from another blogger's post about it) about homemade clothing and society and thought I would pass it along. It doesn't really apply to me yet because I am not a skilled sewer, but I will get there. You should really check it out.
Tuesday, October 18, 2011
Yay I can post comments now!
So I finally figured out how to post comments. I followed the steps listed HERE and now it is working. Which is great because I can now respond to comments and I can enter in giveaways, so many bloggers have had great giveaways on their sites and I have never been able to enter to win any (actually I entered a few by just typing my name and email in instead of being logged in).
There is a great giveaway this week too, I just entered t win a rockabilly (or burlesque) hair piece. It is leopard print, which I normally don't wear, but I am sure my hubby would love (and I could pull it off right?). It would go great with any of my more rockabilly outfits. So here is the link so you can enter to win too.
I am sorry that I haven't been updating the blog much this week yet, I did go out and find bias strips and I got ribbon for the bra straps, but that is about as far as I have gotten, been busy with the kids and cleaning (I completely emptied my kitchen cabinets and bleached the shelves along with rearranging everything and cleaning out the fridge )
I plan to work on it tonight though and should have an update for you tomorrow as long as I don't screw up too bad
Friday, October 14, 2011
Sew-along update
So, I used my favorite tool the seam ripper, separated everything I did the day before and then re-did it. I had a problem with the center and ended up having to cut it and resew it together, figured why not this thing is in so many pieces anyway. I also added a piece onto the back strap so that it is long enough, I pinned the front and back together, but couldn't do anything from there because I didn't have any bias tape. Hopefully I will get some this weekend and finish the bra up. 


Thank you for reading my post. I hope it has been helpful to you (at least let you know what not to do LOL) and I would love to hear your thoughts, tips, ideas, and comments.
Thursday, October 13, 2011
sew-along update
If you happen to be following A Few Threads Loose's lingere sew-along, you may have noticed in my last post what I didn't... I cut out the pieces wrong! I was suppose to tape together the pieces first and THEN cut out only two pieces instead of the 4 that I cut out. Oops. I looked at it before I cut it out and knew there was something wrong because the seam allowances were not on all of the seams and that didn't make sense. Anna did explain this on her blog post, but being a dummy I read the post and then went home and did the cutting on memory because the computer was occupied and my hubby is getting frustrated with how much I am on the computer.
Instead of wasting what I had already cut out, I decided to just try to make due and sew the pieces together and just get it right next time. I also noticed that somehow I didn't cut out enough of one piece and recut that piece again. So, I got it all sewn together and was ready to start on the new post that she put up. The only problem was that the internet was not working on the computer. I was still really excited to continue working on the bra and to not get behind, but I didn't want to make the same mistake as the cutting by not looking at the website, so I decided to use my phone to access the page.
The phone was being extremely slow and most of the pictures would not load, but I got the text and read through it a few times and thought I was comfortable enough with it to go ahead and try it anyway.
This is the first project that I have done that had darts. I looked at Anna's dart post and it looked so easy. So I started at it. I found that it was not as nice and easy as it looked on her page. Now don't get me wrong it wasn't that hard and I think that most people would find it easy, but being my first time I had some problems. The hardest part was getting the needle to come through at the point of the dart. I stuck my finger on the point and then tried putting the needle there, sounds simple, right? Then why wouldn't that dang needle get on the top of that dart? I had to poke it again and again through until I got it to the top. Then I had to turn it over and rub my finger through all of the holes I made in the fabric. At least that made the holes less noticeable and almost disappear, It would have been terrible on a fabric that wasn't as forgiving.
Then came the next part, folding it over and creating a little triangle with the head of the pin at the top center and the two other pins lined up. This also sounds super easy and it was for the top dart; however, sometimes it took forever for me to get the fabric positioned right so that there was a nice flat triangle between the pieces. I did it though. She suggested maybe using a chalk wheel or something to mark the dart, I just used a color pencil that was laying around. Seemed to work fine and it was on the inside anyway and any pencil left visible would be covered by the lining.
The rest of the dart process went pretty smoothly. All I had to do was sew down the darts only a few of which I accidentally sewed the wrong direction (you were suppose to end at the point). I clipped the darts and then pressed.
So using the tiny little iPhone screen on the website helped a little, because I am not sure I could have done the darts without it, but I think it failed me on this next part. I thought the site said that I had to put the tips a 1/5 inch from the center when I sewed the cup to the band. I thought this was odd and made the center look terrible, I even re-read it to make sure. Again with the I should have followed my instinct and just waited until I could look at the pictures on the website because that isn't the way it actually read. But I didn't know that until I got on the computer and looked at the post today. So I sewed it up wrong and tonight will be using my most used sewing tool (even more used that the sewing machine I think)...the seam ripper. Oh well, I will show you the pictures I took anyway...


Oh yeah and I tried it on, (the cups were too far apart obviously), but there was another problem that the cups were too large, so I am thinking I may try to fix that tonight when I redo the band.
I am going to try a new way to end my posts, because I hate the way I was doing it before. I am still working on it though. let me know what you think...
Thank you for reading my post. I hope it has been helpful to you (at least let you know what not to do LOL) and I would love to hear your thoughts, tips, ideas, and comments.
Wednesday, October 12, 2011
Sew-along update and more
 Lingerie sew-along update: I cut out all of the pieces. I am so proud that I am not falling behind on this one, but that maybe because the pattern was already in my size and I didn't have to do any of the size adjustments that some people are having to. Nothing really special to show here.
Oh, I did decide to do all of the bra out of the same fabric instead of the cup out of a different fabric than the band. Mainly because that is what I had available, but I think it will still look nice. I can always make more and if this turns out the way I hope, I plan on making quite a few more of these. How do you handle reusing patterns again and again? and how do you store them? I wasn't sure. I made the pattern for the circle skirt out of a newspaper pieced together (elegant I know). I am not sure if I should keep it or if I should just draft it again (Casey did have very good directions on how to do it).

One more note about the sew-along. I decided not to do the original fabric that I said I was going to use in my last post because I noticed that it had a stain on it and I wasn't sure that I could cut around the stain. So I decided on this fabric.
It is still a flannel receiving blanket (because I have quite a few and they are not in good enough shape to give to my friends expecting). But this one has on it little pink chickens. Chickens are probably even less sexy than little strawberries or roses LOL. I still think they will be cute and super comfy, even if I only get to wear them as pjs (not sure how a bra out of soft flannel will work out for normal wear yet).
 One more thing happened yesterday that I wanted to mention, I got my vintage glasses that I ordered a couple weeks ago and were so excited to get.
They are adorable, but...
They are broken pretty badly. They are broken in multiple places along where the lenses go and they are bent to where they are unrepairable at the bridge. I contacted the seller on etsy and she said to send them back and she would refund my money. Which is okay I guess because I don't
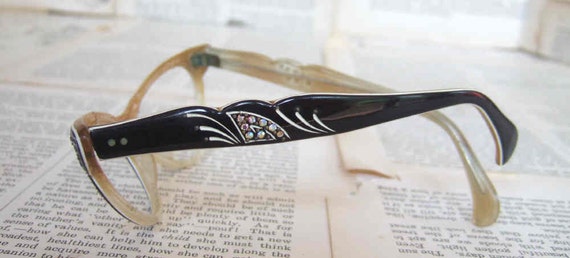 have any use for them and I hate to have spent more than I would have liked on them, but I really wanted a pair of lovely vintage glasses. I looked on ebay and etsy last night and haven't found any that I really like to replace them yet :( Oh well.
I guess that's all. (I still haven't figured out a good way to end posts LOL)
PS - I don't know why I can't respond to comments. It says I dont' have permission (on my own blog LOL). It is no wonder I can't post messages to anyone else's blog when I have comments (to which I normally just give up on).
So here are my responses (I will eventually figure this thing out):
I do love the fabric of the skirt, I realized when writing the first post and looking up the fabric on the store's website that it is listed as quilting fabric. Oh well, I think it looks nice.
The shoes are my favorite shoes. I actually have three pairs in different colors. You can't see in the picture too good but they are checked (yellow and white). I got a black/white pair first (the only color they had), they were half price with a pair of tennis shoes I needed for working out. Then later I saw the other two colors (blue/white and yellow/white) and they were on sale for only $8 AND B1G1, so I got them both. They didn't have any more in my size LOL.
Tuesday, October 11, 2011
Quick sew-along progress update
I started the vintage lingerie sew-along and I am not as behind as I thought. I printed the pattern, added seam allowance and cut it out. I didn't have any tracing paper, but I did find tissue paper laying around. I hope that will work and won't be too fragile, we will see. I also found some fabric that I think might work out nicely, since this is my first attempt at this and I don't want to waste too much money on fabric. It might sound silly but I have quite a collection of baby receiving blankets from when my little ones were babies and I just haven't gotten rid of all of them yet. They are a thin flannel and really soft. And the one I picked out is a print that my mother used for some of my baby clothes (tiny strawberries). I am not sure how sexy it will be, but I think it will be comfortable. That almost brings me up to date on the sew-along, the only thing I haven't done is try the pattern (cut from tissue paper) on. No pictures yet though...
Monday, October 10, 2011
Carshow & Circle Skirt
I was so happy that the weather was nice and warm this weekend because it gave me the chance to try out my circle skirt. What better place to wear it than to the carshow that was happening in Charleston this weekend.


It was getting dark and the pictures didn't turn out very good, but I had fun. I really need to work on posing better for pictures LOL. Years from now when I look back at these first skirt pictures I am going to probably just shake my head :)
Anyway, I wore the skirt without a petticoat with just my vintage 50's full slip underneath. I wore it with my favorite sandals (which will probably get put away for the year now), the pink pearls my hubby bought me for our 5th anniversary (we just had our 7th earlier this year btw), and a modern peachy pink cardigan (which I still think looks pretty good, you have to start somewhere with a vintage wardrobe). Oh and my vintage purse which I love even though it didn't really match this outfit. I have another vintage wicker purse that would have matched better, but I wasn't breaking it out because it is white and after labor day (actually it is dirty and I didn't want to spend the time to clean it).
We went back the next day and I decided to do the whole rockabilly look as opposed to the vintage look. It goes a little better with Ratrods and my hubby prefers it (though I prefer the vintage look, so it will get the most wear).


By the time these pictures were taken we had walked to the very end of the cars and apparently my hair was done for the day LOL. Actually I rolled my hair into two huge victory rolls and one little roll in the front and my hubby thought it was too much, so without even spraying it with hairspray I just tied a bandanna around it to tone it down a bit. I am surprised it held up so good without being sprayed.
So since the circle skirt is completed I am ready for my next garment to tackle which is good because A Few Threads Loose's Pauline sew-along started this weekend and I am already behind. I have the pattern, but no fabric yet and no money to buy any fabric yet (I had figured we would start with a muslin, but it doesn't), so I will probably really get started this weekend. It will be good to get some nice vintage styled lingerie, considering that my 50's slip doesn't fit (It is super cute, but too big). Once I get a little more comfortable with sewing lingerie I want to alter my slip to fit.
Anyway, that is all for now. (I need to figure out a better way to end these posts. hmmm)
It was getting dark and the pictures didn't turn out very good, but I had fun. I really need to work on posing better for pictures LOL. Years from now when I look back at these first skirt pictures I am going to probably just shake my head :)
Anyway, I wore the skirt without a petticoat with just my vintage 50's full slip underneath. I wore it with my favorite sandals (which will probably get put away for the year now), the pink pearls my hubby bought me for our 5th anniversary (we just had our 7th earlier this year btw), and a modern peachy pink cardigan (which I still think looks pretty good, you have to start somewhere with a vintage wardrobe). Oh and my vintage purse which I love even though it didn't really match this outfit. I have another vintage wicker purse that would have matched better, but I wasn't breaking it out because it is white and after labor day (actually it is dirty and I didn't want to spend the time to clean it).
We went back the next day and I decided to do the whole rockabilly look as opposed to the vintage look. It goes a little better with Ratrods and my hubby prefers it (though I prefer the vintage look, so it will get the most wear).
By the time these pictures were taken we had walked to the very end of the cars and apparently my hair was done for the day LOL. Actually I rolled my hair into two huge victory rolls and one little roll in the front and my hubby thought it was too much, so without even spraying it with hairspray I just tied a bandanna around it to tone it down a bit. I am surprised it held up so good without being sprayed.
So since the circle skirt is completed I am ready for my next garment to tackle which is good because A Few Threads Loose's Pauline sew-along started this weekend and I am already behind. I have the pattern, but no fabric yet and no money to buy any fabric yet (I had figured we would start with a muslin, but it doesn't), so I will probably really get started this weekend. It will be good to get some nice vintage styled lingerie, considering that my 50's slip doesn't fit (It is super cute, but too big). Once I get a little more comfortable with sewing lingerie I want to alter my slip to fit.
Anyway, that is all for now. (I need to figure out a better way to end these posts. hmmm)
Saturday, October 8, 2011
I did it! Circle skirt is done!
Yay! I finished the circle skirt. There were a couple of issues, but all in all i am happy with the results. So here is the update...
Waistband: So I did finally catch nancy at home and show her my progress and was happy when she told me that it was pretty good. I showed her the interfacing and waistband and she told me that I shouldn't try to piece together interfacing (because mine was too short for the waistband in one piece because I didn't want to buy a huge amount of interfacing). She gave me a piece of no-iron interfacing the correct size and sent me off to do the waistband by myself. next time I won't skimp when purchasing interfacing (it is not like it is that expensive - the fabric on the other hand...).
Anyway, I did really good job on the waistband sewing the ends and flipping out the corners. Then it came time to pin it to the skirt. Well, this is where there was a problem. It wasn't long enough. What happened? Did I not account for the seam allowance? I am not sure but I had already gotten this far and only had that one piece of interfacing, i wasn't going to let it get in the way of me finishing the skirt on time.

I made the skirt fit into the waistband. It caused a little puckering, which apparently I didn't get a picture of. While looking for that picture I remembered another problem i had though. The waistband should have covered up the stay stitching. However because the stay stitching wasn't very straight (oops) There was a place where the stay stitching peeked out (and pretty badly too).
As you can see I was in the process of ripping out the visible seam in the picture, that was my solution. Not great, but what could I do.


The rest of the waistband insertion went pretty smoothly. Then came the hook-n-eye closure, which I now realize are made for lapped zippers, oops. I attached it anyway without directions. It looks pretty bad, i think I might go back and redo it once I figure out how it was suppose to have been done.


Hem: Well by the time I got to the hem I was upset about other things and should have just went to bed. But no, I didn't. i stayed up till 2 am working on it. The needle came unthreaded and then the bobbin came unthreaded twice, then I ran out of bobbin thread. It was a disaster. I had to finish with not matching thread and after i finished there was a small messed up section that I just let.
So now I am done! Not great, but i can say two things about it that I can't say about any other of my clothes. 1. I made it! 2. It fits great!


Hubby wasn't here to take pictures, so I tried to wing it.
Ok, that's all. I only have a few minutes to submit it for Casey's cssa party. I'll put up a link to it soon.
Waistband: So I did finally catch nancy at home and show her my progress and was happy when she told me that it was pretty good. I showed her the interfacing and waistband and she told me that I shouldn't try to piece together interfacing (because mine was too short for the waistband in one piece because I didn't want to buy a huge amount of interfacing). She gave me a piece of no-iron interfacing the correct size and sent me off to do the waistband by myself. next time I won't skimp when purchasing interfacing (it is not like it is that expensive - the fabric on the other hand...).
Anyway, I did really good job on the waistband sewing the ends and flipping out the corners. Then it came time to pin it to the skirt. Well, this is where there was a problem. It wasn't long enough. What happened? Did I not account for the seam allowance? I am not sure but I had already gotten this far and only had that one piece of interfacing, i wasn't going to let it get in the way of me finishing the skirt on time.

I made the skirt fit into the waistband. It caused a little puckering, which apparently I didn't get a picture of. While looking for that picture I remembered another problem i had though. The waistband should have covered up the stay stitching. However because the stay stitching wasn't very straight (oops) There was a place where the stay stitching peeked out (and pretty badly too).
As you can see I was in the process of ripping out the visible seam in the picture, that was my solution. Not great, but what could I do.
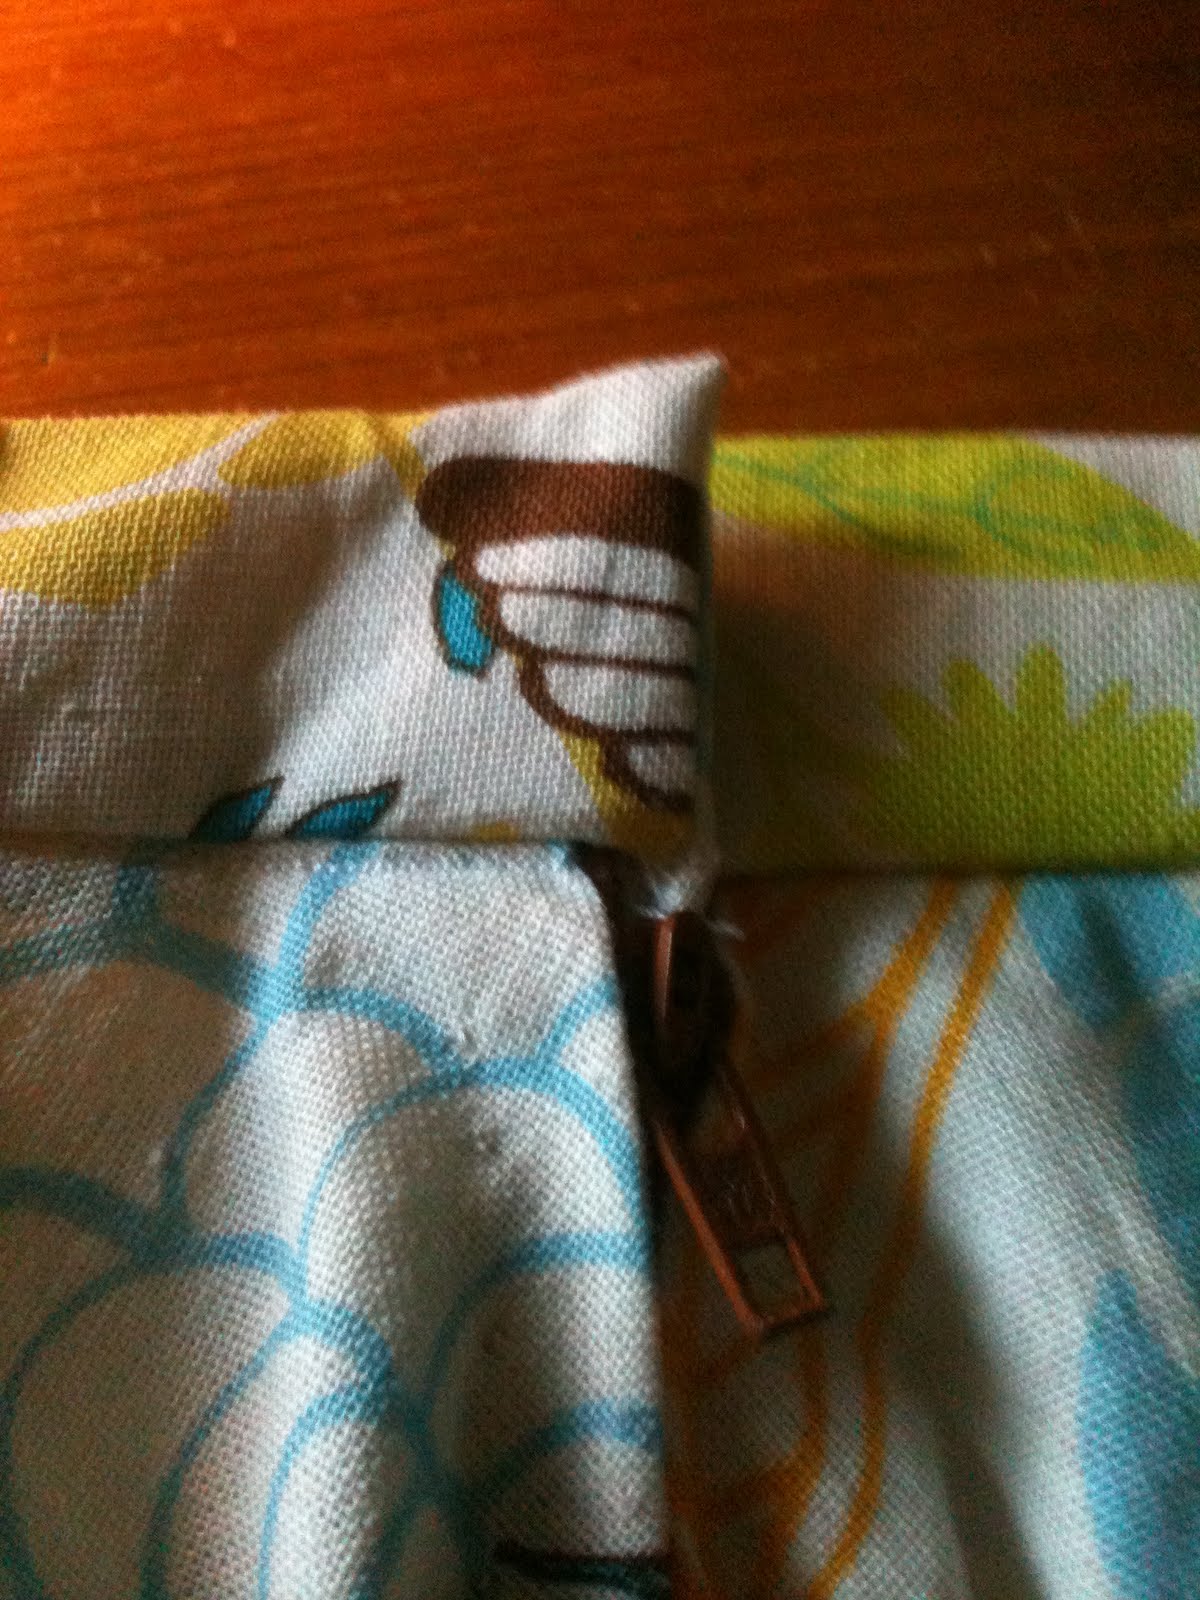

The rest of the waistband insertion went pretty smoothly. Then came the hook-n-eye closure, which I now realize are made for lapped zippers, oops. I attached it anyway without directions. It looks pretty bad, i think I might go back and redo it once I figure out how it was suppose to have been done.


Hem: Well by the time I got to the hem I was upset about other things and should have just went to bed. But no, I didn't. i stayed up till 2 am working on it. The needle came unthreaded and then the bobbin came unthreaded twice, then I ran out of bobbin thread. It was a disaster. I had to finish with not matching thread and after i finished there was a small messed up section that I just let.
So now I am done! Not great, but i can say two things about it that I can't say about any other of my clothes. 1. I made it! 2. It fits great!


Hubby wasn't here to take pictures, so I tried to wing it.
Ok, that's all. I only have a few minutes to submit it for Casey's cssa party. I'll put up a link to it soon.
Thursday, October 6, 2011
Blogs I Follow
So, my husband was talking about some of the blogs I follow and it dawned on me that you could see them by clicking on my profile. So I updated the list. Now, I was already following all of the blogs I added with IE, it is just easier for me to look at and remember that way, but they were not listed so you could see them so I went ahead and added them in case anyone is interested. I may also add them to a sidebar if it doesn't take too much effort.
On another note, I did not get to work on my skirt last night. I did think about my wardrobe some more because I added tons of images to pinterest and of course my fall/winter wardrobe can not be that large, I need to take babysteps. So, I need to work with some of the pieces I already have and I need to figure out how to work my work wear into it because where I work you have to wear company logo shirts, I ordered some that I think are going to go with my wardrobe, but I will have to wait and see what they turn out like, I know that I have been excited the past two times about getting good items and then when they arrived I have been disappointed. Crossing my fingers though.
Well that's all for now. Maybe I will get lucky and Nancy will be at home during lunch and I can work on my skirt then.
Wednesday, October 5, 2011
Circle Skirt
So, for my first get into sewing project I decided to do Casey's circle skirt sew-along.
Let me get you caught up to where I am now...
I drafted the skirt. I didn't have a drafting compass so I did the measure and put dots and then connect dots with a curved line method which I worried about because I am not the greatest at curved lines, but I drew lots of dots to try to make up for it. We will see if this presents itself a problem when I go and look at the hem of the skirt, but for now all seems well with that. I decided to make the skirt a little longer than knee length, I think that matches the era that I am going for and would look nice.
So I go looking for fabric, I look online and luckily realize that I am not that certain what a print would look like in real life when it was multiplied so many times right on top of each other. It was a really good thing because when I went to JoAnn's and looked at the fabric I liked online, it was not even close to what I had imagined. One disaster avoided, yay! I did end up picking out a print fabric that I love.
Fabric at JoAnnns
(I couldn't get the picture to come up, I am new to this blogging thing after all)
Once I get the fabric I start thinking that maybe I should have gone with a knee length skirt, because I think it might make a good flirty springy skirt, but when I asked, everyone agreed that the below the knee length was a better look, so I didn't modify the pattern I made.
I was so excited about it that I decided to show it off to my mother (and anyone else who I could) and she noticed as I held it up to body, that it looked as if the birds beak was positioned badly (we watch too much project runway. It reminded us of the "Cancelled on her crotch" pants. So I decide to cheat a little bit here. I went to a family friend who i know sews a lot and told her about the project and showed her the print and she offered to have me come over at lunch and she would help me cut it out so that we didn't have any bird issues. Which is what I did. Another disaster avoided. However in order to get all of the birds positioned upward (and avoiding the weird beak angle) I had to cut the circle skirt into 4 pieces :( and there is a seam up the front of the dress. Something I am just going to have to deal with. It did make a seam in the back too though, so that is good because I like zippers in the back.
So, I see in the directions to sew in the zipper. But I see that the seam below the zipper has to be sewn first.
 I have a vintage sewing machine.
Which I love, but don't know how to use. Well, actually I barely know how to use my regular sewing machine. LOL
I remember only a few things from sewing as a teenager and I rack my brain to think of what to do.
I start off ok, I pin the fabric (2 pieces anyway) right sides together. Scared to ruin the fabric, I put a test piece through the sewing machine.
Good thing too because the stitches were a wadded mess. So at this point I am so happy that I didn't have to try to rip that out of my skirt. I remember something about thread tension, not enough to know how to fix it, but just enough to know that it might be the cause of my problems.
So I rip out the sewing machine manual and look up thread tension. I learn that it is the numbered wheel above the needle.

Both the wheel and the part around the numbers move so, that was a little confusing, but I finally got the tension set to where it wasn't a tangled mess with the test fabric and it actually made stitches. Yay!
I also remember something about backstitching at the beginning and ending of the stitch so it doesn't come out. So I did that and stitched up all the seams one after another leaving room for the zipper in the last one.
Then it occurred to me that I don't have a zipper foot for this machine (I will have to double check to see if I have one for my modern machine). That is fine though because it would have been a pain to try to wrangle that much fabric around to try to put in the zipper. It would have been smarter to have put the zipper seam in first and then stitched up the other sides. But I didn't realize that then.
Anyway, I hand picked the zipper in and it looked pretty good, well I was pleased with myself. The seams had a little problem at the bottom and the skirt seemed too big, but maybe the waistband and hem would fix those problems or so I thought.
Next comes the waist band. I am a little scared of the waistband so, I decide I am going to cheat again. I don't figure it is cheating if she wants to help, right? I mean I want quality workmanship on my clothes (the best I can do). I take her the skirt and the waistband, interfacing, etc.
I tried the skirt on and showed her that it was also too big. She stopped me and showed me that I was stretching the fabric. She told me that because I cut the fabric on the bias I would have to do a stay stitch at the top of each panel before sewing them together. Which meant I had to take it apart, which was okay because who looks at the seams and says that the stitches are too long, almost like basting stitches. Oops, I knew I must have forgotten something, that was much too easy. She also said the problem with the bottom of the stitches also had to do with cutting on the bias. She told me that the fabric would stretch less if I started the stitches from the bottom. I didn't really see how that could make a difference, but I trusted her because she knows.
So as the kids are watching a movie, I take out all of my stitches, which was depressing because I thought I was doing such a good job. I remembered reading about setting the stitch size in the sewing machine manual and it set to set this lever (see pic below) to zero when doing straight stitches, which is what I did.

But, since I knew she told me my stitch length was wrong, I got back out the sewing machine manual about stitch length (the stitch size I remembered was stitch width for zigzag stitches not stitch length, oops).
I sent the kids to bed and got back out the sewing machine.
This was the stitch length switch (the same as the forward reverse switch that I thought I used so well). I read online and found out that a general stitch length should be 2.5 to 3.5 so I set that.
I went on my merry way and stitched up the tops of the panels and the stitched up the seams, there was a slight issue of sewing from the bottom of the skirt because I pinned the skirt the wrong direction, but that was quickly remedied and I finished sewing all the seams (it did make a difference in the bottom by sewing from the bottom btw).
So I hand stitched back in the zipper and went to bed. I brought the skirt (and waistband, interfacing, etc) to work with me today in hopes that I would get to cheat again and visit Nancy.
I went over at lunch and alas she was not there. But in order for me to try to attempt to finish this skirt and get pictures posted by Friday in order to make it to the sew-along "party" I might have to do it by myself. I am not sure though. We will see how I feel about it this evening.
So, now you are all caught up.
Let me get you caught up to where I am now...
I drafted the skirt. I didn't have a drafting compass so I did the measure and put dots and then connect dots with a curved line method which I worried about because I am not the greatest at curved lines, but I drew lots of dots to try to make up for it. We will see if this presents itself a problem when I go and look at the hem of the skirt, but for now all seems well with that. I decided to make the skirt a little longer than knee length, I think that matches the era that I am going for and would look nice.
So I go looking for fabric, I look online and luckily realize that I am not that certain what a print would look like in real life when it was multiplied so many times right on top of each other. It was a really good thing because when I went to JoAnn's and looked at the fabric I liked online, it was not even close to what I had imagined. One disaster avoided, yay! I did end up picking out a print fabric that I love.
Fabric at JoAnnns
(I couldn't get the picture to come up, I am new to this blogging thing after all)
Once I get the fabric I start thinking that maybe I should have gone with a knee length skirt, because I think it might make a good flirty springy skirt, but when I asked, everyone agreed that the below the knee length was a better look, so I didn't modify the pattern I made.
I was so excited about it that I decided to show it off to my mother (and anyone else who I could) and she noticed as I held it up to body, that it looked as if the birds beak was positioned badly (we watch too much project runway. It reminded us of the "Cancelled on her crotch" pants. So I decide to cheat a little bit here. I went to a family friend who i know sews a lot and told her about the project and showed her the print and she offered to have me come over at lunch and she would help me cut it out so that we didn't have any bird issues. Which is what I did. Another disaster avoided. However in order to get all of the birds positioned upward (and avoiding the weird beak angle) I had to cut the circle skirt into 4 pieces :( and there is a seam up the front of the dress. Something I am just going to have to deal with. It did make a seam in the back too though, so that is good because I like zippers in the back.
So, I see in the directions to sew in the zipper. But I see that the seam below the zipper has to be sewn first.
 I have a vintage sewing machine.
Which I love, but don't know how to use. Well, actually I barely know how to use my regular sewing machine. LOL
I remember only a few things from sewing as a teenager and I rack my brain to think of what to do.
I start off ok, I pin the fabric (2 pieces anyway) right sides together. Scared to ruin the fabric, I put a test piece through the sewing machine.
Good thing too because the stitches were a wadded mess. So at this point I am so happy that I didn't have to try to rip that out of my skirt. I remember something about thread tension, not enough to know how to fix it, but just enough to know that it might be the cause of my problems.
So I rip out the sewing machine manual and look up thread tension. I learn that it is the numbered wheel above the needle.

Both the wheel and the part around the numbers move so, that was a little confusing, but I finally got the tension set to where it wasn't a tangled mess with the test fabric and it actually made stitches. Yay!
I also remember something about backstitching at the beginning and ending of the stitch so it doesn't come out. So I did that and stitched up all the seams one after another leaving room for the zipper in the last one.
Then it occurred to me that I don't have a zipper foot for this machine (I will have to double check to see if I have one for my modern machine). That is fine though because it would have been a pain to try to wrangle that much fabric around to try to put in the zipper. It would have been smarter to have put the zipper seam in first and then stitched up the other sides. But I didn't realize that then.
Anyway, I hand picked the zipper in and it looked pretty good, well I was pleased with myself. The seams had a little problem at the bottom and the skirt seemed too big, but maybe the waistband and hem would fix those problems or so I thought.
Next comes the waist band. I am a little scared of the waistband so, I decide I am going to cheat again. I don't figure it is cheating if she wants to help, right? I mean I want quality workmanship on my clothes (the best I can do). I take her the skirt and the waistband, interfacing, etc.
I tried the skirt on and showed her that it was also too big. She stopped me and showed me that I was stretching the fabric. She told me that because I cut the fabric on the bias I would have to do a stay stitch at the top of each panel before sewing them together. Which meant I had to take it apart, which was okay because who looks at the seams and says that the stitches are too long, almost like basting stitches. Oops, I knew I must have forgotten something, that was much too easy. She also said the problem with the bottom of the stitches also had to do with cutting on the bias. She told me that the fabric would stretch less if I started the stitches from the bottom. I didn't really see how that could make a difference, but I trusted her because she knows.
So as the kids are watching a movie, I take out all of my stitches, which was depressing because I thought I was doing such a good job. I remembered reading about setting the stitch size in the sewing machine manual and it set to set this lever (see pic below) to zero when doing straight stitches, which is what I did.

But, since I knew she told me my stitch length was wrong, I got back out the sewing machine manual about stitch length (the stitch size I remembered was stitch width for zigzag stitches not stitch length, oops).
I sent the kids to bed and got back out the sewing machine.

This was the stitch length switch (the same as the forward reverse switch that I thought I used so well). I read online and found out that a general stitch length should be 2.5 to 3.5 so I set that.
I went on my merry way and stitched up the tops of the panels and the stitched up the seams, there was a slight issue of sewing from the bottom of the skirt because I pinned the skirt the wrong direction, but that was quickly remedied and I finished sewing all the seams (it did make a difference in the bottom by sewing from the bottom btw).
So I hand stitched back in the zipper and went to bed. I brought the skirt (and waistband, interfacing, etc) to work with me today in hopes that I would get to cheat again and visit Nancy.
I went over at lunch and alas she was not there. But in order for me to try to attempt to finish this skirt and get pictures posted by Friday in order to make it to the sew-along "party" I might have to do it by myself. I am not sure though. We will see how I feel about it this evening.
So, now you are all caught up.
Fall/Winter inspiration
This is just a quick post to let you know some of the ideas and inspirations for my fall/winter wardrobe (or what I hope for them to aspire to in the future at some point anyway).
Here is a link to my inspiration board (which has way too much on it LOL)
http://pinterest.com/btotten/fall-winter-clothing-inspirations/
I did a good amount on my circle skirt last night (though I was a bad blogger and forgot to take pictures of the first half of the process). I will hopefully post an update on that later today. Still hoping there is a chance I may get the circle skirt done in time for the "cssa party"
Tuesday, October 4, 2011
Yay, I have started a blog!
Yep. I finally decided that I needed to start a blog. Mind you this still doesn't mean that I will be blogging all of the time as I still have a full time job and 3 little ones to take care of. However, I have finally been able to force some sewing in (Casey's circle skirt sew-along) and I needed a place to put up the pictures. I will try to keep the blog updated, but don't get upset if I take a long time between posts :)
As you can see the name of the blog is "a series of (unfortunate) vintage sewing attempts". I am not sure that I should have limited it to sewing, because I have had a series of unfortunate other events in my attempts to create a new wardrobe for myself.
See my intent is to create/obtain a wonderful wardrobe to express myself because my wardrobe is quite lacking and I don't even like the majority of it. Besides that, I can't fit into most of it post-babies.
Yes I do plan on trying to edit my diet and keep with an exercise routine and lose some weight (no, I don't think I will make it back to pre-babies and I am completely fine with that). However, I don't need my clothing to make me look and feel horrible with the way I am right now. I want clothes that express me and make me feel great, isn't that what everyone wants?
Anyway, on my adventure to obtain this kind of wardrobe, I have bought a few things here and there, and had terrible luck at it. Either the pieces don't fit, they don't go with anything, or it just plain doesn't match what I thought it would look like when I bought it. Plus the majority of the problem is that I can't afford what I really want.
So in an effort to get some quality clothing I have attempted to start sewing. Now, I do realize that in order to sew quality stuff, I will need quality material and whatnot, but that isn't really too much of a concern right now because I first have to worry with the fact I can't sew (or knit, crochet, etc).
This blog is here for documentation of all of my attempts (failed or not) of sewing (and anything else that comes up). Hopefully it will serve as a reminder to me so I will not make the same mistakes twice (or at least not too many times LOL). I also hope that it might help other people who might run across any of the problems I experience in case I do come up with a solution. It also might help to know there is someone out there experiencing these problems and you are not alone (because I read a ton of blogs and they make it all seem so easy, and it isn't - well at least for me!).
At least you might be able to look at this blog and say "It could be worse. Look at her". LOL
Subscribe to:
Comments (Atom)