My father recently passed away after an 18 month battle with pancreatic cancer.
I have gained quite a bit of weight this past year so I no longer fit into any of my vintage clothes. Beyond that I am just not interested in wearing skirts and dresses right now. I don't know why. I know that skirts with wool tights are much warmer than pants, but I am just not feeling skirts.
This left me with a single pair of jeans which were not in good shape, so I did it. I'm not proud of that moment, but I caved and bought a pair of jeans from Walmart. They fit really well and I like the look of them. Though, I feel ashamed because I want to purchase ethically made clothing whenever I do buy clothes. The only problem is that I need to try on clothes before I know what size to get. So any suggestions on a physical store that sells ethically made jeans at reasonable prices. I prefer American made if possible.
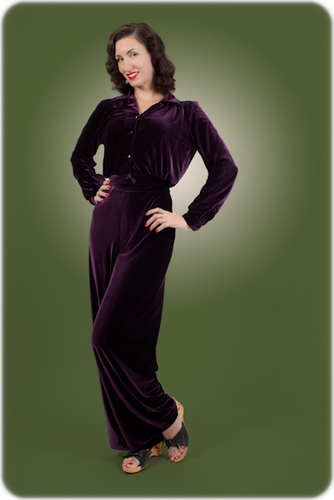
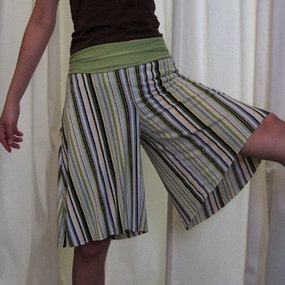
I am thinking of making a pair of vintage pants and seeing if I would feel comfortable wearing them. I have two patterns to consider


Does anyone have any experience with either of these patterns? I have never seen pants before. What about fabrics? I love wool but have never sewn with it and do not know which types are good for winter pants. I know I want something fairly heavy weight.
I have been training for two pancreatic cancer events, a 5k and a triathlon. I do not have much free time for exercise, so I have been doing this during lunch. Which means showering and wet hair at lunch. Hair is the main part of my vintage look and I do not generally have time to even dry it before heading back to work after doing two sport workouts. So does anyone have any wet hairstyles they can recommend. I have been sticking with the ponytail sadly.
Also any vintage inspired workout gear would be great. I made a Pinterest board for workout clothes, but haven't found anything really practical